
Updated October 13, 2026. Rewritten for the printers beginners actually buy now. They level themselves, so the old advice to level your bed before every print is gone.
Some links on this page are affiliate links. If you buy through one, Planet 3DP earns a small commission at no extra cost to you. It never changes what we recommend. How this works. As an Amazon Associate I earn from qualifying purchases.
Getting into 3D printing is easier in 2026 than it’s ever been. Today’s beginner printers set themselves up, level their own beds and print from your phone. What still trips people up is everything around the printer: the slicer, the filament, and knowing what to fix when a print fails.
This guide walks you through it in order, from picking a printer to designing your own parts. The printer facts come from the makers’ own pages and setup guides. The hands on advice comes from Nick, who runs Planet 3DP and its YouTube channel and has put tens of thousands of hours on printers from most of the big brands.
- 1. Pick a type
- Start with a filament (FDM) printer, not resin.
- 2. Pick a printer
- Judge it on setup, reliability, total cost and support, not speed.
- 3. Set it up
- Follow the screen. The printer calibrates itself.
- 4. Learn one slicer
- They’re all related, so what you learn carries over.
- 5. Find models
- MakerWorld, Printables and Thingiverse have thousands for free.
- 6. Print a test
- A Benchy and a 20 mm cube tell you if everything’s right.
- 7. Stick with PLA
- It’s the easiest filament, and it works on an open printer.
- 8. Keep filament dry
- Wet filament causes most of the weird problems.
- 9. Mind the air
- Ventilate, and keep ABS and ASA out of living spaces.
- 10. Design your own
- Free tools get you from idea to print.
Step 1: Start with a filament printer
There are two kinds of home 3D printer. Filament printers, called FDM, melt plastic and push it through a nozzle one layer at a time. Formlabs, which makes both kinds, calls FDM the most widely used type of 3D printing at the consumer level. The tradeoff is that you can see the layer lines.
Resin printers (SLA) cure liquid resin with light. Formlabs says SLA gives the best resolution and the smoothest surface, but parts have to be washed and often cured after printing. Liquid resin also needs care. Formlabs says to wear nitrile or neoprene gloves, not latex, because skin contact can cause an allergic reaction.
For a first printer, filament is simpler, cleaner and cheaper to run. If you’re still deciding, FDM vs resin 3D printing goes deeper.
Step 2: Choose your first printer
Spec sheets push print speed and build volume. Neither matters much on a first printer. These four things do.
| What to judge | The question to ask |
|---|---|
| Out of the box | How long from opening the box to the first print? |
| Reliability | Does it just work, or will you fight it every time? |
| Total cost | What does it cost once you add filament, tools and a year of supplies? |
| Support | When something goes wrong, is there an app, a big community and videos to help? |
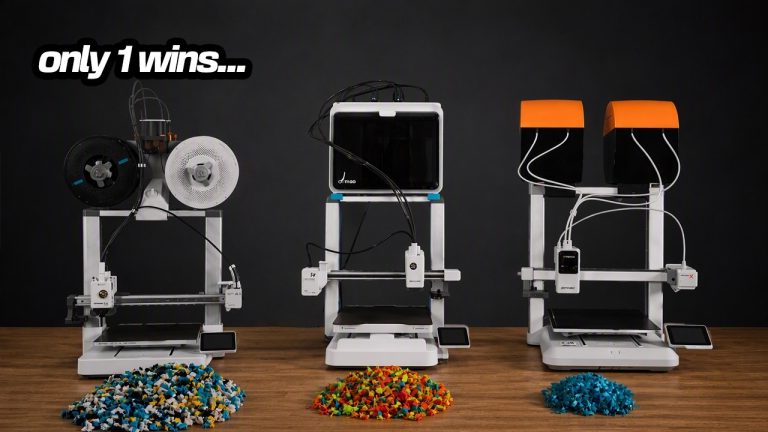
Nick ran the three printers he’d hand a beginner in 2026 side by side: the Bambu Lab A1, the Creality SparkX i7 and the Anycubic Kobra X. Here’s how they compare on the facts that matter in your first week.
| Bambu Lab A1 | Creality SparkX i7 | Anycubic Kobra X | |
|---|---|---|---|
| Leveling | Calibrates itself after you power it on | Full auto leveling | LeviQ 3.0 auto leveling |
| Nozzle it ships with | 0.4 mm stainless steel | Hardened steel | 0.4 mm hardened steel |
| Multicolor | AMS lite, 4 spools in the open | CFS, 4 spools in a closed box | 4 colors fed into the toolhead, up to 19 with add ons |
| Setup time (Nick) | About 25 minutes, then about 10 to print | About 5 minutes | About 20 minutes |
| Slicer | Bambu Studio | Creality Print 6.3 or newer | Anycubic Slicer Next |
All three are good first printers. The A1 has been out the longest and is the safest pick. The SparkX i7 is the fastest to set up. The Kobra X wastes the least filament when you print in color. The full test, with prices and filament waste weighed on the same print, is in Nick’s best beginner 3D printer comparison.
Watch: three beginner printers, side by side
Step 3: Your first week
Older guides tell you to level the bed by hand before every print. You can skip that now. All three printers above level themselves. Bambu Lab’s calibration covers auto bed leveling along with vibration compensation, and Creality lists full auto leveling on the SparkX i7. Your job is mostly following the screen.
| What the printer does | What you do | |
|---|---|---|
| Bambu Lab A1 | Runs its own setup and calibration when you power it on | Lift it by the base, never the heated bed. Before the first print, slide the bed by hand to its far end. Then slice in Bambu Studio and match your AMS lite spools to the file. |
| Creality SparkX i7 | Pulls filament in on its own and reads Creality RFID spools | Set the CFS Lite on the left and plug in its tube and cable. Type in the details for spools without RFID. Turn on Enable CFS and Calibration before you print. |
| Anycubic Kobra X | Arrives mostly put together. The app walks you through setup | Nick’s advice: skip the files stored on the printer and slice your first print yourself. |
Two more tips. Let the plate cool before you pull a print off, as Creality advises. And on the A1 you can skip pairing the phone app during setup and do it later.
Step 4: Learn one slicer
A slicer turns a 3D model into G code, the step by step instructions your printer follows. It’s where you choose layer height, supports, infill and speed, and it’s where most of your learning happens.
Here’s the good news. Most of the slicers you’ll meet are one family, built on the same open source code. Learn one and the rest feel familiar.
| Slicer | Built on | Made by |
|---|---|---|
| Slic3r | The original | Alessandro Ranellucci and the RepRap community |
| PrusaSlicer | Slic3r | Prusa Research |
| Bambu Studio | PrusaSlicer | Bambu Lab |
| OrcaSlicer | Bambu Studio and PrusaSlicer, with ideas from Cura and SuperSlicer | SoftFever and the community |
| Creality Print | OrcaSlicer | Creality |
| Anycubic Slicer Next | OrcaSlicer | Anycubic |
Start with the slicer made for your printer. It already has the right profiles. PrusaSlicer is free, needs no account and works with other brands’ printers too, according to Prusa.
One warning if you try OrcaSlicer. Its only official site is orcaslicer.com. The project says copycat sites with similar names have pointed people to dangerous downloads.
If you have a Bambu printer, Nick’s complete Bambu Studio tutorial covers just about every setting in a little over an hour.
Step 5: Find things to print
You don’t need to design anything to start. Model sites have more than you’ll ever print.
- MakerWorld is Bambu Lab’s site. Many models come with a print profile, a Bambu Studio file with the settings already filled in. Bambu Lab says to check that a profile supports your printer before you use it.
- Printables is Prusa’s site. PrusaSlicer has a Printables browser built in.
- Thingiverse is one of the oldest model libraries and is still a good place to look.
Nick’s tip: you can print from any of these on any printer. Download the file, open it in your slicer and send it. He prefers that to printing from a phone app anyway, because you get more control. If you plan to sell prints, check the license on the model’s page first.
Step 6: Run two test prints
A Benchy. The little tugboat everyone prints first. It shows you overhangs, bridges, small details and stringing in one short print. Nick prints one on every new printer.
A 20 mm calibration cube. Measure it with calipers. Nick uses this to check flow. If the cube measures off, your extrusion is off too.
If either one goes wrong, the 10 most common 3D printing problems shows you what to check, in order.
Free beginner packA shopping list, a 30 day plan for your first month, a filament cheat sheet and a one page failure prevention guide.
Get the free PDFStep 7: Start with PLA
PLA is the easiest filament to print. Bambu Lab says it doesn’t warp easily, so it prints well on open frame and enclosed printers alike. Buy a few rolls of PLA and get good with it before you try anything else.
| Filament | Nozzle temp (Bambu Lab) | Enclosure? | Good to know |
|---|---|---|---|
| PLA | 190 to 240°C | No | The easiest place to start |
| PETG | 240 to 270°C | Bambu Lab recommends one | Tougher than PLA, prone to stringing |
| TPU | 200 to 250°C | No | Flexible. Bambu’s AMS units can’t feed it |
| ABS | 240 to 280°C | Yes | Gives off harmful, irritating fumes |
| ASA | 240 to 280°C | Yes | Same fumes warning as ABS |
| Carbon or glass fiber blends | Varies | Depends on the base plastic | Needs a hardened steel nozzle |
Fiber filled and glow in the dark filaments are abrasive and wear out a soft nozzle. Bambu Lab ships the A1 with a stainless steel nozzle and says carbon or glass fiber PLA and PETG need hardened steel. The SparkX i7 and Kobra X come with hardened steel nozzles.
There’s a lot more on each plastic in the Planet 3DP filament guide.
Step 8: Keep your filament dry
Filament soaks up moisture from the air. Bambu Lab lists what that causes: stringing, missing material, holes, rough surfaces and weaker parts. Wet filament can clog the nozzle too.
Bambu Lab says most filaments need under 20% humidity to stay dry, and freshly dried filament can start absorbing moisture again within about 2 to 12 hours in a normal room. So dry it, then store it sealed with desiccant.
The makers don’t agree on drying numbers. Bambu Lab lists 50 to 60°C for 8 hours for PLA. Prusa dries its own PLA at 45°C for 6 hours. Follow the label on your spool. The full drying table covers the other plastics.
Where your spools sit while printing matters too. The A1’s AMS lite holds them in the open. The SparkX i7’s CFS keeps them in a closed box. Nick printed an enclosure for the spools on his Kobra X for under ten dollars of PETG.
Step 9: Think about air, noise and space
Printing plastic puts tiny particles and fumes into the air. A 2020 fact sheet from UL’s chemical safety group says printers can release up to a trillion particles an hour, mostly ultrafine, and over 200 different chemical compounds have been found in printer emissions. ABS gives off far more of both than PLA.
UL’s advice is simple. Print at the lowest temperature that still gives good results, put the printer in a large room with good airflow or add exhaust close to it, and use printers and filaments that have been tested for low emissions.
Plan the space too. The A1’s bed slides front to back, and Bambu Lab says to leave about 695 mm for it. In silent mode it runs at around 48 dB.
Small office? Nick prints PLA in the same room he works in. The smell gave him headaches until he added an air purifier. He’s clear it wasn’t a scientific test, and that a purifier is no substitute for ventilation with tougher plastics.
Step 10: Design your own parts
Once you’ve printed other people’s models for a while, you’ll want to make your own. These are the free places to start.
| Tool | Cost | Catch |
|---|---|---|
| Tinkercad | Free | Simple shapes, made for learning |
| Autodesk Fusion (personal use) | Free for 3 years | Noncommercial only, under $1,000 a year in income from it, with limited features |
| Onshape Free | Free | Noncommercial, and every document you make is public |
You can skip CAD for a lot of projects. Nick turns logos into multicolor prints with two free programs, Inkscape and Bambu Studio. He also has a tutorial on turning a photo into a 3D print with Tripo.
What it costs to get started
Here’s a starting budget based on Nick’s numbers. Treat it as a worksheet, not a quote. Prices move a lot.
| Item | Budget | Where the number comes from |
|---|---|---|
| Printer with multicolor | $349 to $399 | List prices of the three printers above, checked by Nick on August 20, 2026 |
| PLA to start | $60 to $100 | Nick’s advice. Buy more if there’s a sale |
| Flush cutters and a wood chisel set | About $20 | Nick’s go to tools for support removal |
Skip a few things Nick wishes he hadn’t bought: hand Allen key sets (an electric screwdriver is faster), canned air (a cordless blower replaces it) and bed adhesive sprays (a clean plate does the job). His full list is on the essential tools page.
Common questions
Is 3D printing hard to learn?
Much less than it used to be. Today’s beginner printers set up in about 5 to 25 minutes and level themselves. Most of the learning is in the slicer, and the popular slicers are related, so the skills carry over.
Do I need to know CAD to 3D print?
No. MakerWorld, Printables and Thingiverse have thousands of free models. When you want to make your own, Tinkercad is free, and you can turn a logo into a print with free tools and no CAD at all.
How much does it cost to start 3D printing?
The three beginner printers Nick tested listed at $349 to $399 when he checked on August 20, 2026. Add about $60 to $100 of PLA and about $20 for cutters and a chisel set.
Is 3D printing safe indoors?
Printers release ultrafine particles and chemical fumes, and ABS releases far more than PLA, according to UL. Print PLA in a room with good airflow, use the lowest temperature that works, and keep ABS and ASA out of living spaces.
Do I need an enclosed printer to start?
No. PLA prints well on an open frame printer. You need an enclosure for ABS and ASA, and Bambu Lab recommends one for PETG.
What should I print first?
A Benchy and a 20 mm calibration cube. The Benchy shows overhangs, bridges and stringing. Measuring the cube with calipers tells you if your extrusion is right.
- Formlabs: Types of 3D printers (checked October 13, 2026)
- Formlabs: Resin care (checked October 13, 2026)
- Bambu Lab Wiki: A1 Combo unboxing (checked October 13, 2026)
- Bambu Lab Wiki: First print with the AMS lite (checked October 13, 2026)
- Bambu Lab Wiki: A1 FAQ (checked October 13, 2026)
- Bambu Lab Wiki: Printer calibration (checked October 13, 2026)
- Creality: SparkX i7 product page (checked October 13, 2026)
- Creality: SparkX i7 first print guide (checked October 13, 2026)
- Anycubic: Kobra X store page (checked October 13, 2026)
- Bambu Lab Wiki: Filament guide material table (checked October 13, 2026)
- Bambu Lab Wiki: Drying filament (checked October 13, 2026)
- Prusa Knowledge Base: Drying filament (checked October 13, 2026)
- Bambu Studio on GitHub (checked October 13, 2026)
- OrcaSlicer on GitHub (checked October 13, 2026)
- Creality Print on GitHub (checked October 13, 2026)
- Prusa Research: PrusaSlicer (checked October 13, 2026)
- Bambu Lab Wiki: MakerWorld FAQ (checked October 13, 2026)
- UL Chemical Insights: 3D printing basic facts (2020) (checked October 13, 2026)
- Autodesk: Fusion for personal use (checked October 13, 2026)
- Onshape: Free plan (checked October 13, 2026)
- Tinkercad (checked October 13, 2026)
- Planet 3DP video: I Ran All 3 Of The Best Beginner 3D Printers (Aug 22, 2026) (checked October 13, 2026)
- Planet 3DP video: New 3D Printer? Don't Start Without These Tools (Apr 23, 2026) (checked October 13, 2026)
- Planet 3DP video: Turn Any Logo Into a 3D Print (Sep 18, 2026) (checked October 13, 2026)
- List prices as verified in the beginner printer video description (checked August 20, 2026)
Host of Planet 3DP. I’ve been 3D printing for over four years, with tens of thousands of print hours on Bambu Lab, Anycubic, Creality, Elegoo and Snapmaker machines. Planet 3DP on YouTube.
Last checked October 13, 2026.